All you need to make a vintage-themed collage is a pair of scissors, a glue stick, a piece of cardboard or other backing material to use as a “canvas” (for this theme a small brown paper bag works great) as a background and some magazines, paper scraps from wrapping paper etc., paper napkins, used tea bags for that sepia color, dried flowers, pieces of old fabrics/lace, pages from an old book that you can find at the flea market. If you just have a couple of magazines at home, that is fine, too. Just look for images and colors that have a “vintage” touch to them. You can also use some sandpaper to distress the images lightly to give them a more worn feel.
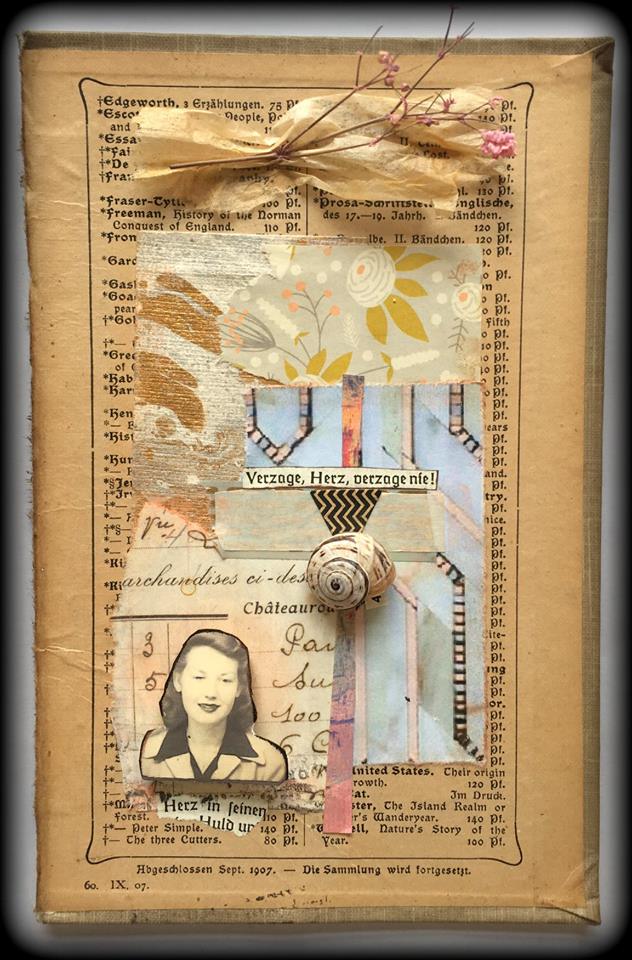
In the collage below I used an old book cover from the flea market (the inside was printed in old lettering) as my surface, then added differently textured scrap papers in a similar color range of beige, sepia, yellow, light blue, light pink and a soft orange to match the “vintage” theme. From the same book I cut out some words and also glued on a little snail shell to add 3-dimensional touch. These are all optional additions, of course. But they are the most fun and make your collage unique.
The picture of the woman is cut out from a postcard with old photo booth images. My Special tip: For a great selection of free vintage style images you can visit one of my favorite sites: www.thegraphicsfairy.com
-
Step by step
Flip through your magazines and cut or tear out whatever images interest you or stimulate your imagination. According to the theme you choose, look for images that evoke the look and feel of that theme. In this case keep in mind the color range of sepia, brown, bronze, gold, black and pastels.
- Pick a central image as your focal point (for example a vintage girl). Then choose a couple of additional images or words or paper scraps to complement the composition. To make it more visually interesting you can use some textured wrapping paper, paper napkins or other craft paper you might have at home. Used tea bags are great for the delicate paper and the tea stain color (just cut the bag open after it has cooled down and remove the tea leaves – be very careful when glueing dem down as they tend to tear, however, this adds to the vintage look).
 Now it’s time to put it all together. But before you glue your images down, play with the composition and experiment with different positions and angles. You will probably intuitively know where a certain image just sits right. I recommend to place your focal image off-center (like the picture of the woman below) and then continue to add any additional items – they should vary in shape and size to add more visual interest. But don’t go over-board with tons of images. Often “less is more” here!
For finishing touches you can play with rubber stamps, dried flowers, and crayons….
